We often compose emails we want to send later because we’re drafting them isn’t the best time to send them, or simply because we want to postpone sending our emails until another day. We show you how to schedule emails from your Mac.
How to schedule emails on a Mac
Here are 5 easy steps on how to schedule emails to send later on a Mac:
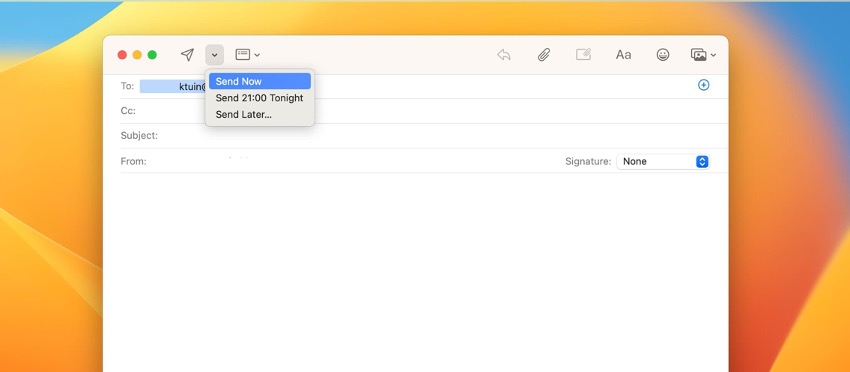
Step 1 - Write your email and before you send it, click on the tab next to the send button. A drop-down menu will open up, and several options will appear.
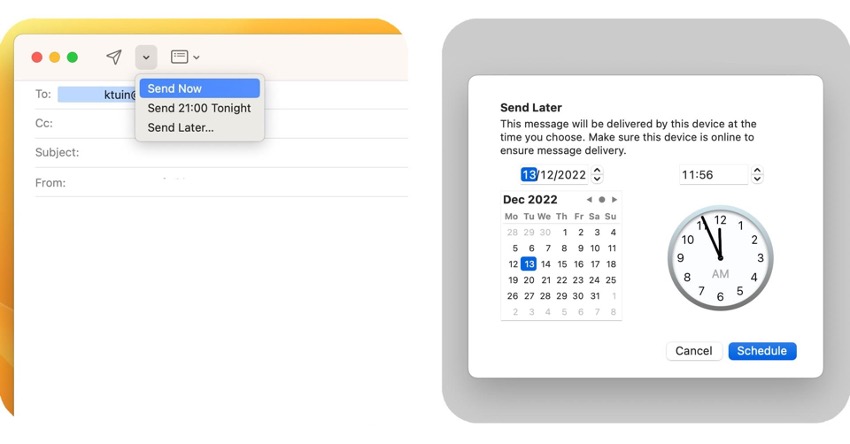
Step 2 -You can choose one of the suggested times or click "Send later."
Step 3 - A window with a calendar and a clock will open up. Now choose the day and time you want the message to be sent.
Step 4 - Once selected, click "Schedule," and that's it.
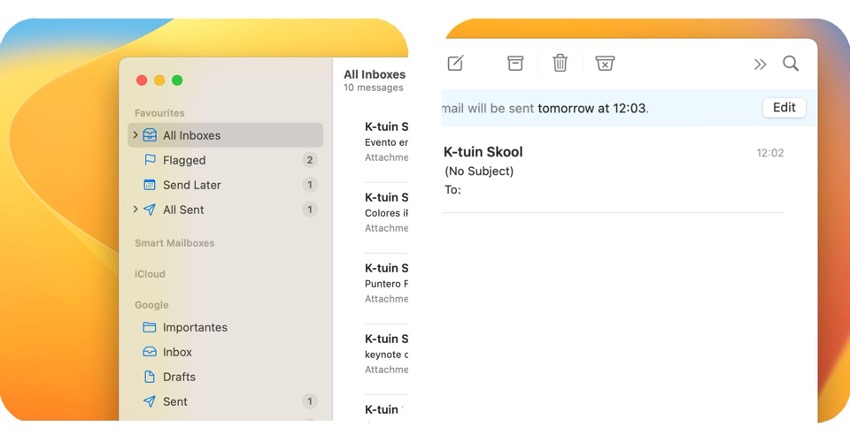
Step 5 - Your message will now appear in the "send later" box.
If this option doesn’t appear, please note that you need to have Mac OS Ventura or later installed in order to schedule emails from your Mac.
Also learn how to schedule an email on iPhone, here.
How to edit the time and day of emails that you have already scheduled
You will now be able to check what time your email will be sent from the "send later" box. If you want to change this, click on the "Edit" option.
The window with the calendar and the clock will reappear, and you need to select the new day and time for sending and click on the "schedule" option again to schedule emails on your Mac.
Check out our iSTYLE blogs to learn more about the world of Apple products & the other tricks and tips you need to know!

 United Arab Emirates
 Oman
Oman Lebanon
 Morocco
 Iraq
Iraq Hungary
 Romania
 Czech Republic
 Serbia
 Croatia
 Slovakia
 Bulgaria
 Slovenia
 Macedonia
 Spain (K-Tuin)

