There are a thousand and one reasons you should put a password on a Mac folder for private documents and photos.
Is that possible? Yes, it is! A hidden trick on your Mac allows you to create a password-protected folder.

Steps to add a password to a Mac folder
There is no direct way to add a password on a Mac, but this trick will do just that. It's about harnessing the full potential of the Mac!
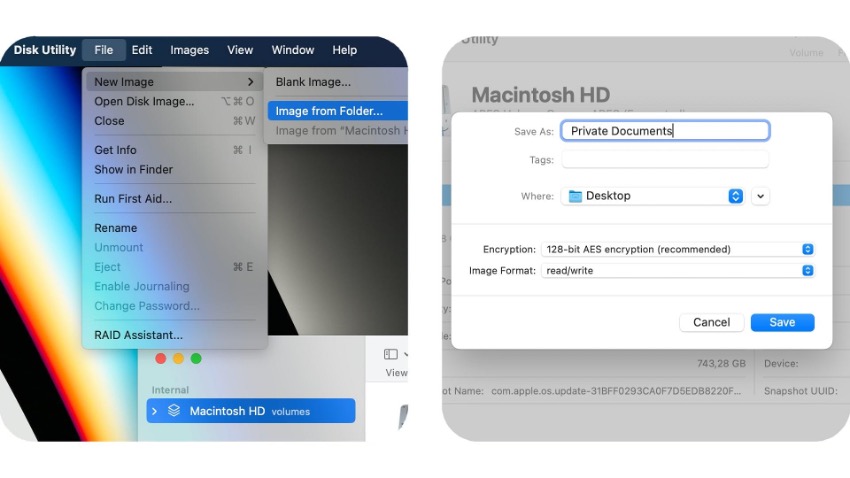
Step 1 - Open the Disk Utility app
Step 2 - In the top menu go to File> New Image> Folder Image
Step 3 - Select the folder you want to protect with a password
Step 4 - Under encryption select AES 128 bits and create the password you want for the Mac folder.
Step 5 - In image format select read/write
Step 6 - Save your folder and you're done!
You have now created your password-protected folder on your Mac. Now it's time to delete the original folder and keep the new one you created.

How does the Mac password folder work?
This password-protected folder that you have created on your Mac works differently from a traditional folder. This is an encrypted drive
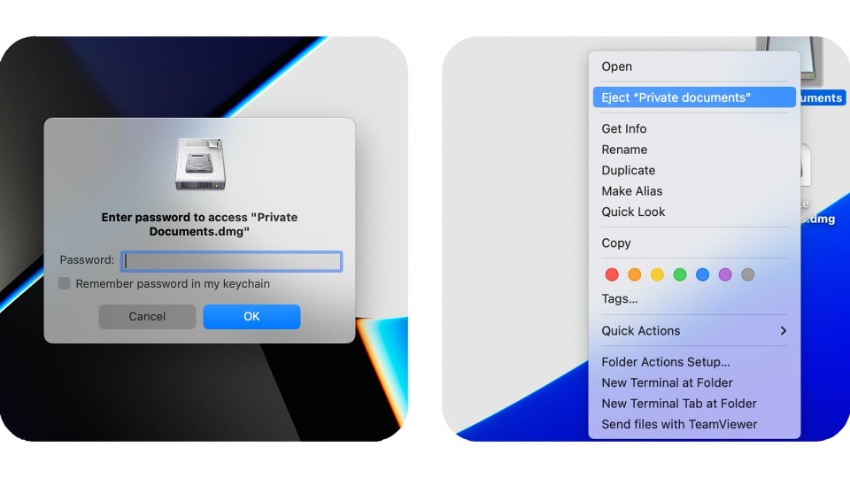
- When you click on the password-protected drive or folder, you will be prompted to enter your password.
- You will be able to view, delete and add new files to this private drive.
- When you have finished working on it, right-click on it and click eject. This will lock the password-protected folder on your Mac.

One last trick or tip! Did you know that you can do something similar with the Notes app? Inside a note, you can add text, images, and documents. And, of course, also lock it with a password!
Check out our iSTYLE blogs to learn more about the world of Apple products & the other tricks and tips you need to know!

 United Arab Emirates
 Oman
Oman Lebanon
 Morocco
 Iraq
Iraq Hungary
 Romania
 Czech Republic
 Serbia
 Croatia
 Slovakia
 Bulgaria
 Slovenia
 Macedonia
 Spain (K-Tuin)


